How Our Tests Work
This page explains what happens during a scan and how to read the output it produces.
During a typical run, the SDK:
- loads the page, HTML document, or component you want to test
- runs the applicable accessibility rules for that test context
- prints a short summary in the terminal
- writes a detailed report file to disk
For most first-time users, the HTML report is the easiest place to start. Once you are comfortable with the results, you can switch to JSON, CSV, or SARIF when you need machine-readable output, spreadsheet-style review, or CI-friendly baseline support.
What the terminal summary tells you
Every scan prints a compact summary so you can quickly confirm that the SDK ran and see whether any issues were found.
% npx aetest scan < document.html
::: START AudioEye SDK CLI :::

Scanning HTML from STDIN

Found 7 accessibility issues
   Html_SkipLink_Missing - count: 1
   Img_Name_Missing - count: 6

Full Test Results were output to testing-sdk/aetest_output.html

::: END AudioEye SDK CLI :::
Use this summary to answer the first onboarding questions:
- Did the SDK run successfully?
- How many issues were found?
- Which rule codes appeared?
- Where was the full report written?
HTML Output
The default output format is HTML. It is the best choice when you want a human-readable report that developers, QA, or other teammates can review directly in a browser.
You can open the generated HTML file and inspect each issue in more detail. Here is an example result:
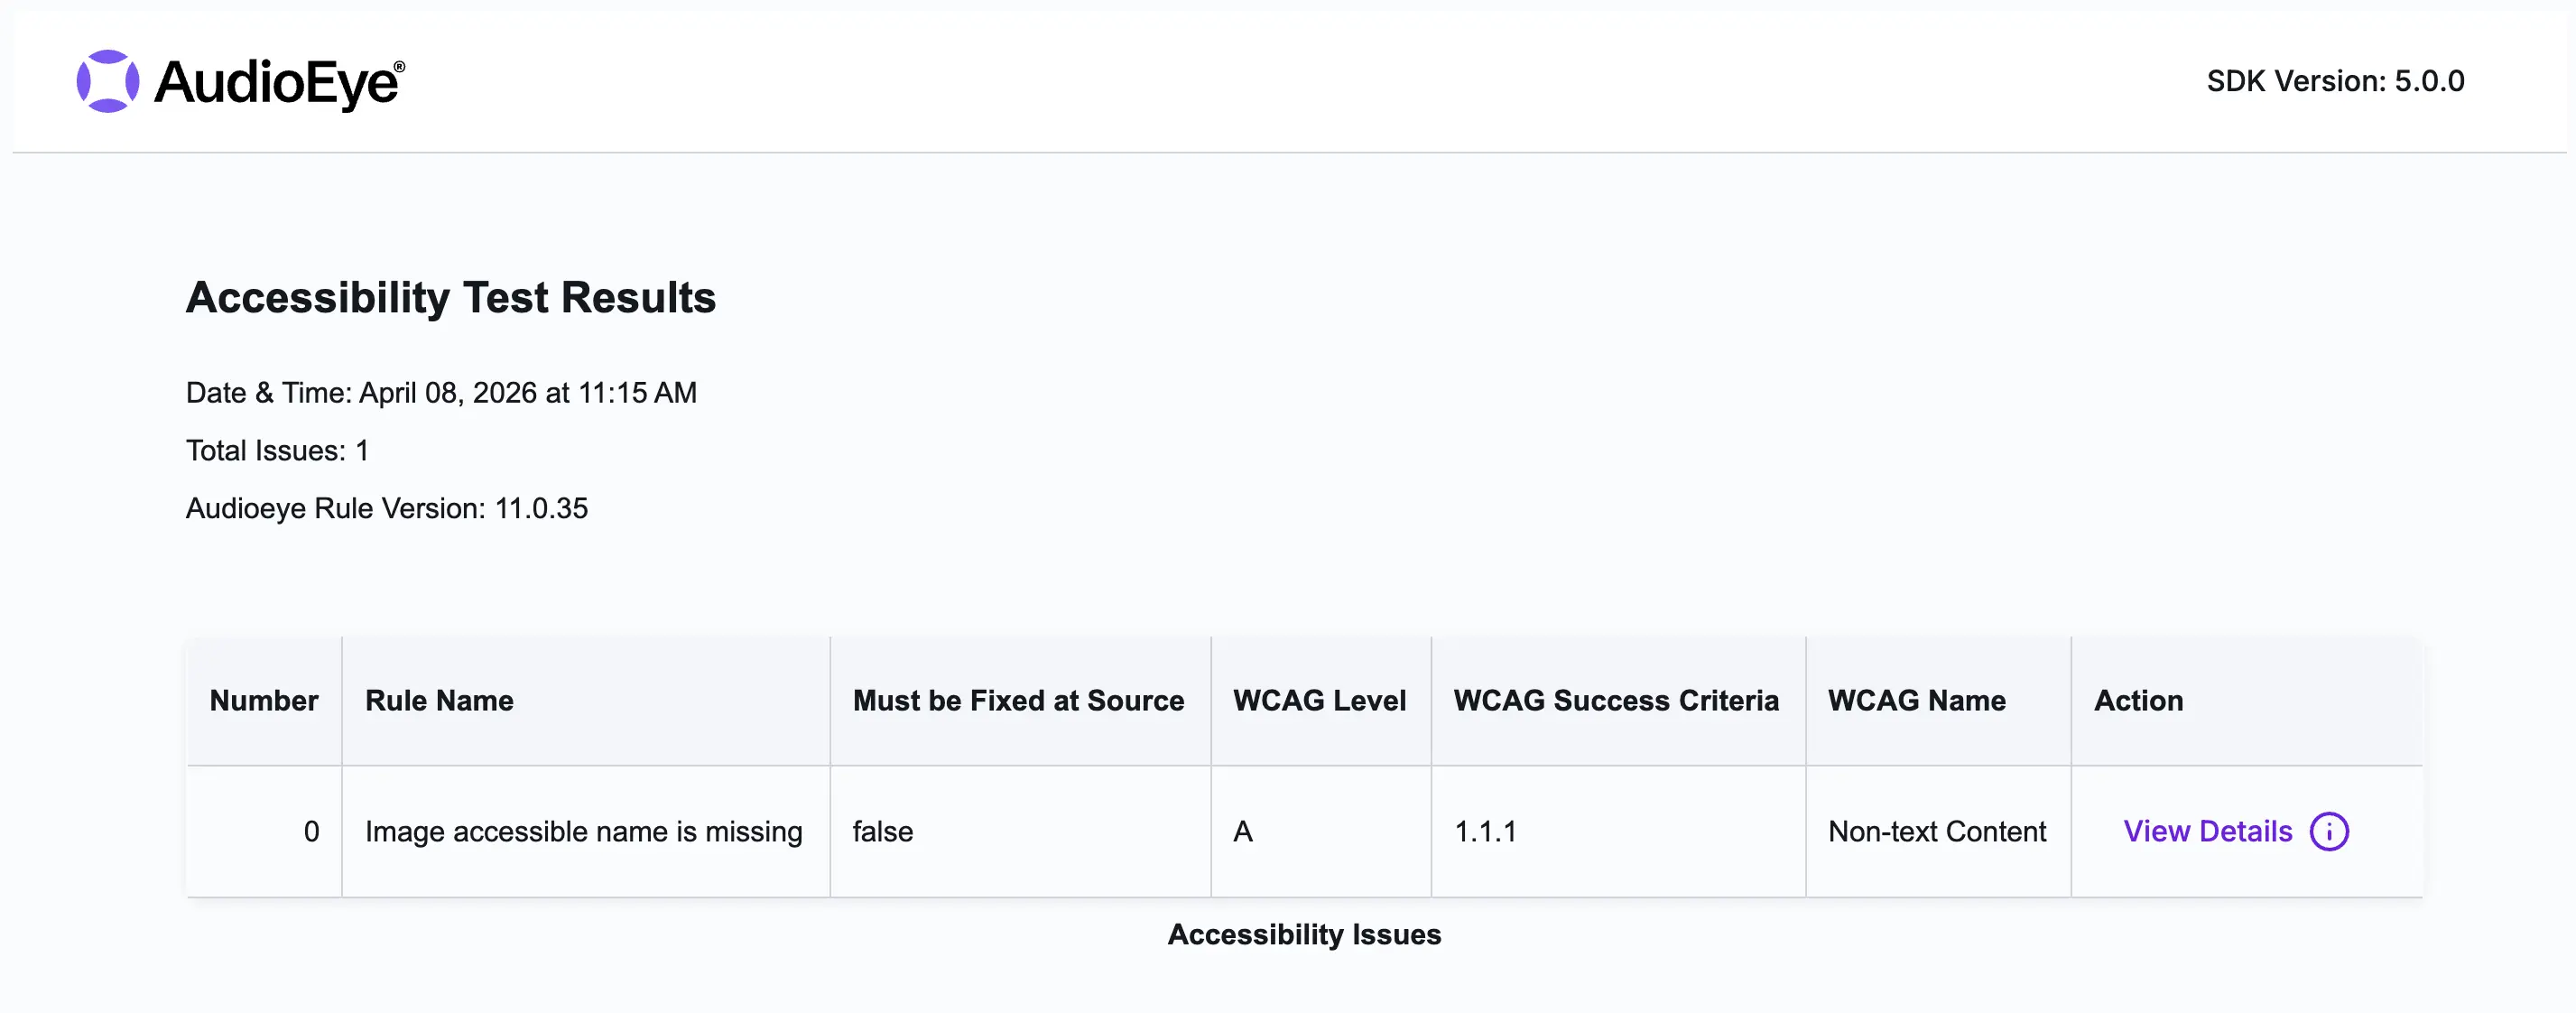
For each issue, the report includes:
- Number – A number identifying this issue in the report
- Rule Name – The name of the rule that was run.
- Must be Fixed at Source - If true, the issue can only be fixed in the source code. If false, AudioEye automated remediations could be used to fix.
- WCAG Level - The WCAG conformance level for the issue detected
- WCAG success criterion (number + name) – The corresponding WCAG criteria for each rule.
When you click View Details on an issue, you also get:
- Rule Code – The rule code indicates the specific issue that was discovered.
- Element Location – The HTML element for which this issue occurred.
- Description – A description of what the rule checks for.
- How to fix - Explanation of how to fix the issue.
Use the HTML report first when you are onboarding, debugging a new test, or trying to understand why a rule fired.
JSON Output
Use JSON when you want machine-readable output that can be processed by scripts, stored as an artifact, or transformed into another format later.
% npx aetest scan --component --format json < component.html
::: START AudioEye SDK CLI :::

Scanning HTML from STDIN

Found 3 accessibility issues
   Img_Name_Missing - count: 3

JSON file saved to testing-sdk/aetest_output.json

::: END AudioEye SDK CLI :::
JSON output is useful when you want to:
- post-process results in your own tooling
- attach structured artifacts to CI runs
- compare results across runs programmatically
Each issue in the JSON output now also includes:
id— a stable SARIF-compatible fingerprint of the rule + selector + elementhelpUrl— direct link to the rule's developer documentationxpath— XPath for the violating element, alongside the existingcssSelectorboundingBox— element layout box in real-browser scansframe— frame chain when the violation is inside an iframerelatedNodes— additional context elements when the rule provides them
CSV Output
Use CSV when you want a spreadsheet-friendly export that can be reviewed in Excel, Google Sheets, or imported into project-management workflows.
% npx aetest scan --component --format csv < component.html
::: START AudioEye SDK CLI :::

Scanning HTML from STDIN

Found 3 accessibility issues
   Img_Name_Missing - count: 3

CSV file saved to testing-sdk/aetest_output.csv

::: END AudioEye SDK CLI :::
SARIF Output
Use SARIF when you want CI-grade output that integrates with GitHub code-scanning, ingests into other SARIF-aware tools, or serves as a baseline for suppressing known issues.
% npx aetest scan --format sarif < document.html
::: START AudioEye SDK CLI :::

Scanning HTML from STDIN

Found 3 accessibility issues
   Img_Name_Missing - count: 3

SARIF file saved to testing-sdk/aetest_output.sarif

::: END AudioEye SDK CLI :::
The SARIF output is SARIF v2.1.0. Each result has a
stable partialFingerprints.issueFingerprint so the same finding receives the same id across runs as long as the rule
code, target selector, and element shape are unchanged. That's what powers aetest scan --baseline <path> — see
Baselines for the workflow.
Choosing the right format
- Use HTML for first-run verification and issue investigation
- Use JSON for CI artifacts, automation, and custom reporting
- Use CSV for spreadsheet review and manual triage workflows
- Use SARIF for GitHub code-scanning, baselines, and integration with other SARIF-aware tooling